• Always save
• Organize your work
• Avoid five edges and try to maintain 4 corners in your polys
• Avoid overlapping edges and vertices
• Its an advantage to be familiar with low-poly modeling
• Watch out for the flow of topology
• It is best to be familiar with the anatomy or skeletal structure of your character
• Character proportioning
CHARACTER RIGGING
CAT Introduction
CAT or Character Animation Tool kit, is a 3ds Max tool kit used for rigging, skinning and adding motion to a character for animation. Let's get started!
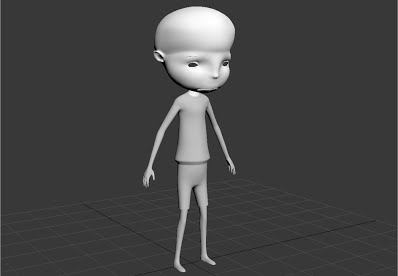
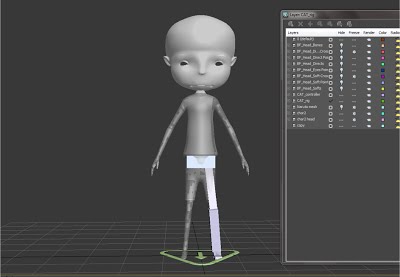
Load your model/mesh centered in viewport..
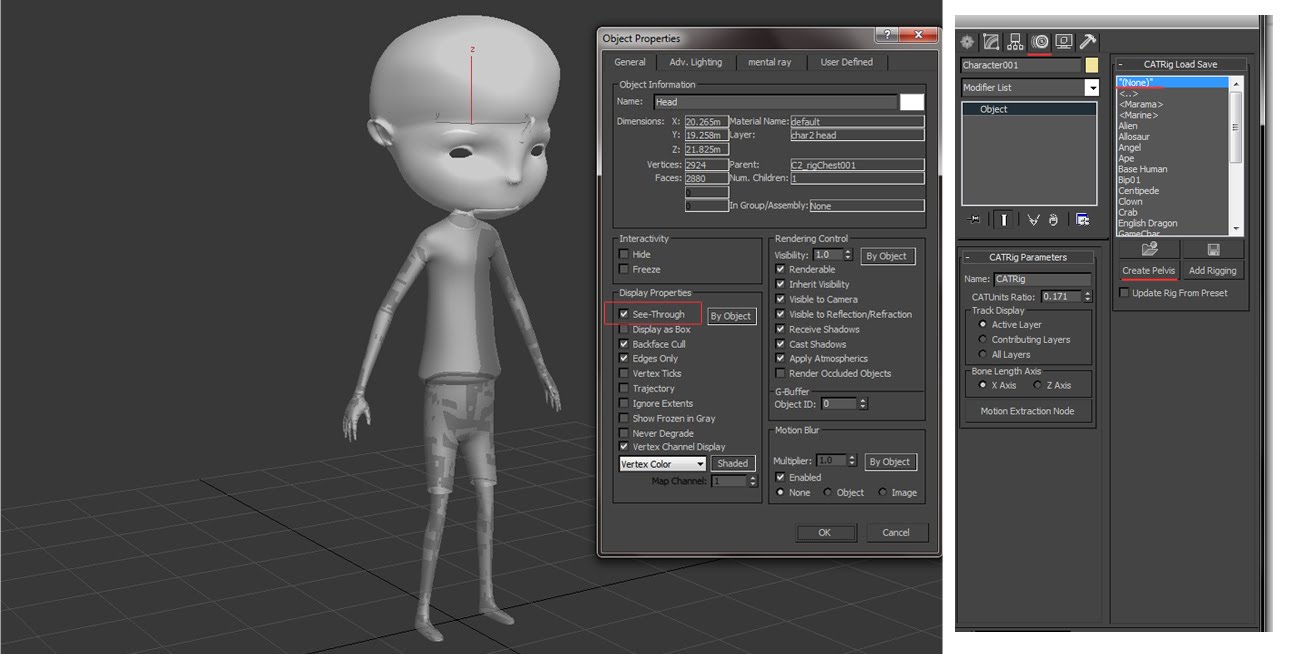
Set the Object Properties to See-Through and open CAT tool.
Go to Command Panel-Helper tab select CAT Objects and click CATParent. Load CATRig preset to None, to create custom rig.
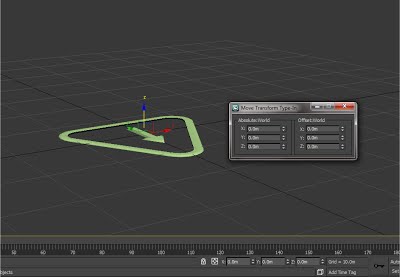
Position CATParent to World x=0, y=0, z=0.
Create Pelvis and Legs Rigging
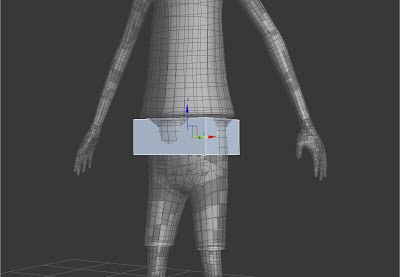
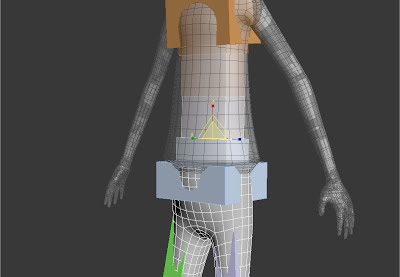
Create a Pelvis and position it consequently to the mesh.
Add a Leg. Line or position the leg accordingly to your mesh.
The key of this process is proper positioning of the pivot points or the joints to the mesh.
Setup the foot. Set the Num Digits to 1 only. Use 5 if the toes are showing.
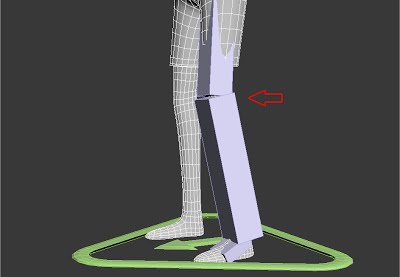
Position the knee. Exaggerate the bending position to avoid knee pop while animating. It does not matter if mesh leg is straight or not.
Position the Upper leg slightly inward.
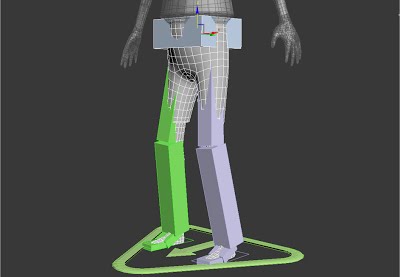
Go back to hub or pelvis and create another leg. This will automatically mirror the leg we just created.
Create Spine and Arm Rig
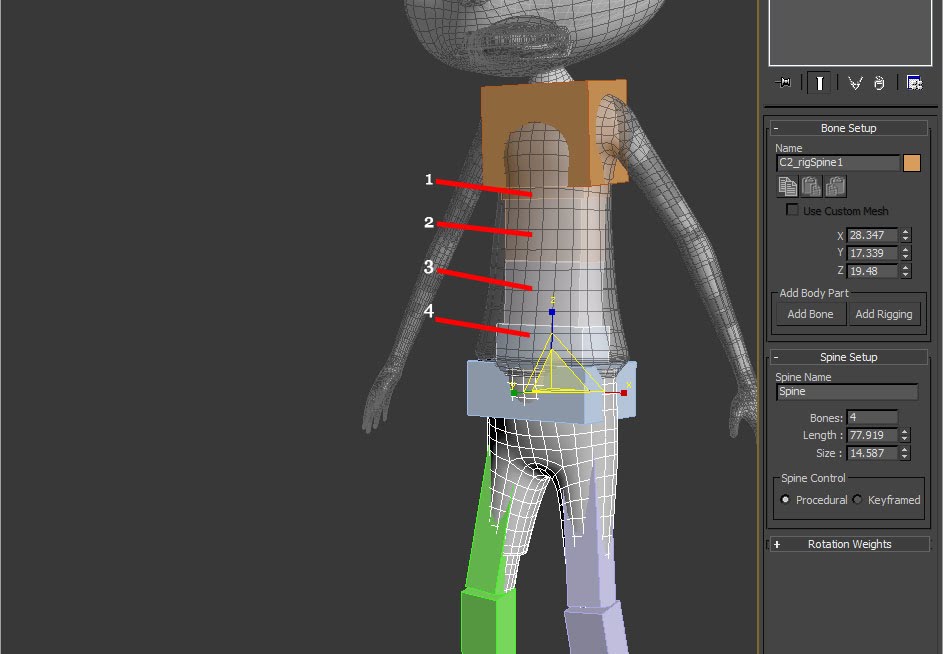
To create the upper body, select the pelvis or the hub and click Add Spine.
Set spine bones to your needs. Remember, more bones means more work on skinning. Resize the chest part according to the size of mesh chest.
Also resize the spines.
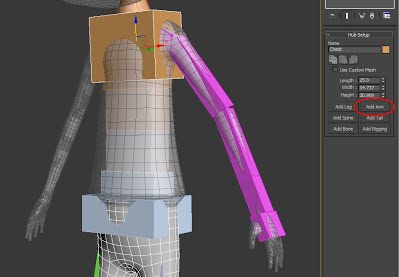
Select Chest and click Add Arm. Position the arm to mesh accordingly. Align them using other views. Pay attention to pivot points location or joints position.
Resize the arm if needed.
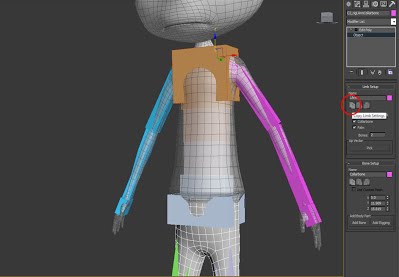
Create the other hand by selecting the chest hub and click Add Arm, which will automatically mirror the arm we just created.
Create Hands and Fingers Rig
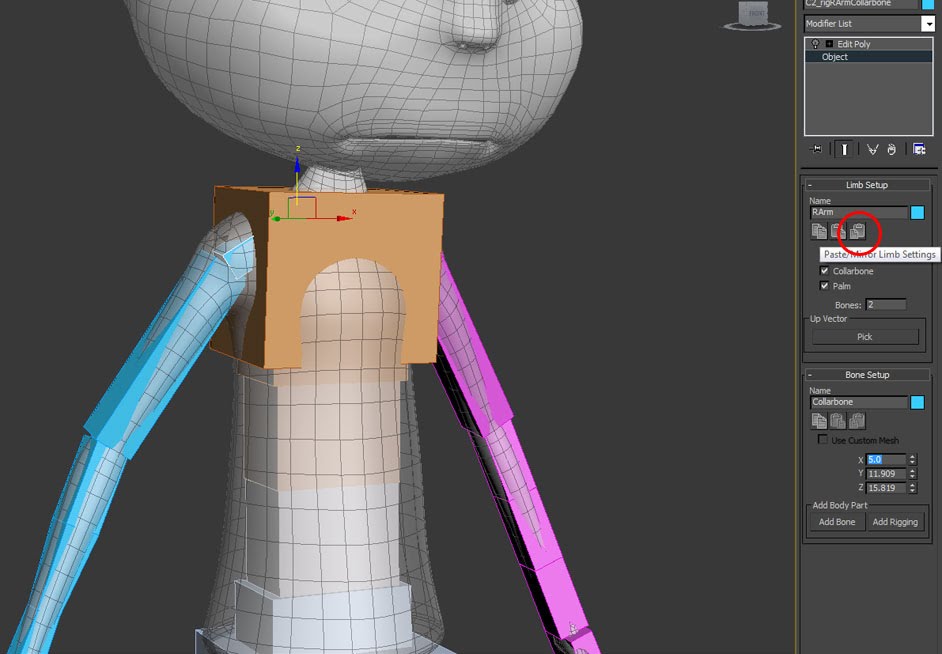
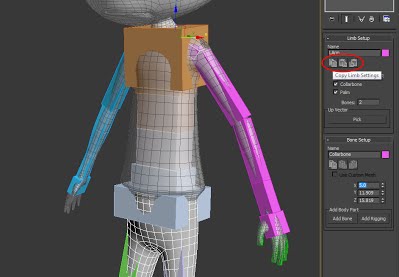
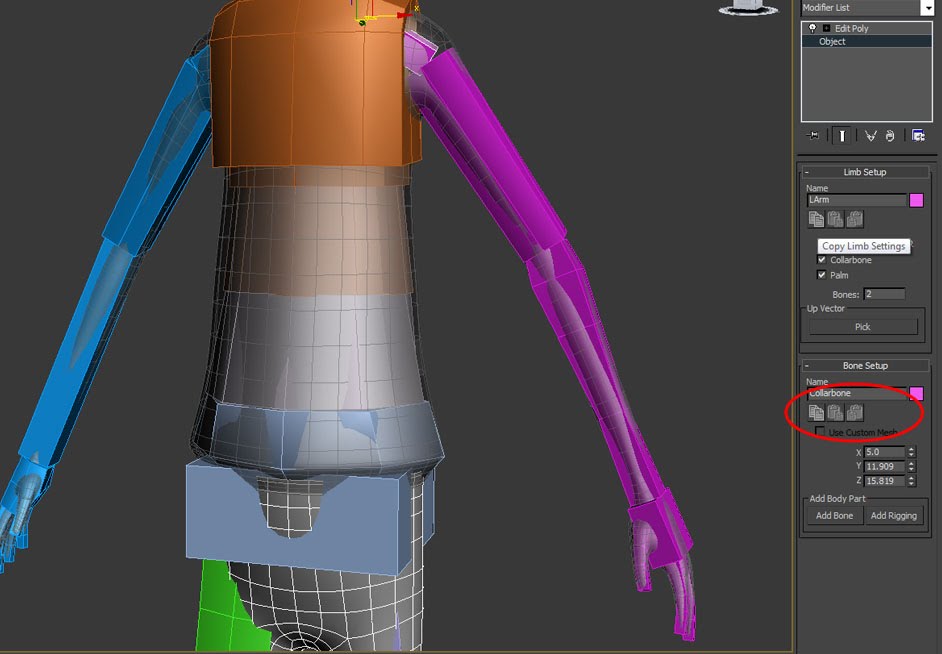
If ever you have edits to the arm or legs, just select the Collarbone and click Copy Limb Settings Icon.
and select the other Collarbone and click Mirror Limb Settings to quickly transfer your edits for the arm. Do the same process to the Thigh on editing Leg.
Adding the Fingers
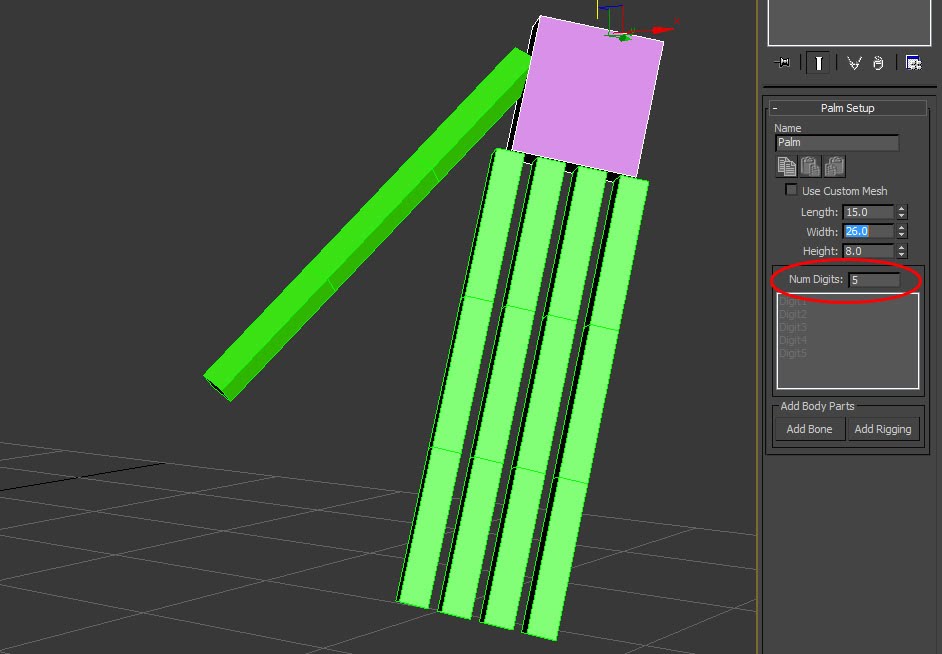
Select the Palm and set Num Digits to 5 for fingers
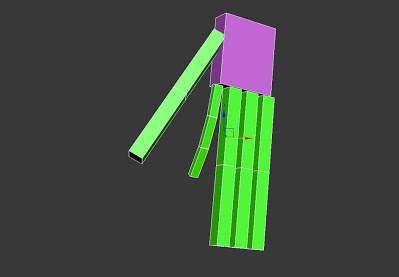
Position and resize the finger according to the mesh. Start working with the Index finger first.
You may copy the parent bone settings of the finger and paste the settings to the next finger you are working. Just resize them accordingly to your mesh.
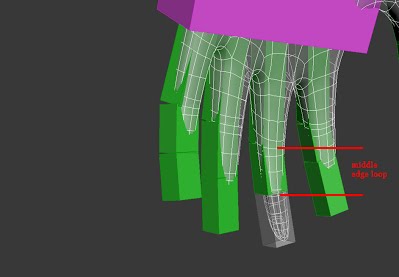
Pay attention to positioning of the pivots (joints). To get this right, position the pivot point to the middle edge loop of the mesh finger.
For your convenience, resize the fingers thinner than the mesh finger. Resize them when you are done. Isolate the palm and fingers from other bones so you can focus working on them.
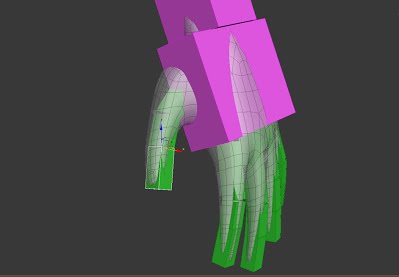
The proper rigging or positioning of the thumb is further back of the palm.
Adjust the thumb according to the mesh.
Select collarbone and copy the settings. Select the other collarbone and paste mirror the settings to transfer it to the other fingers.
Create Head Rig
Select Chest hub and click Add Spine to create the head.
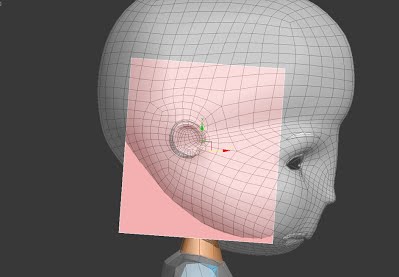
Position and resize the head according to the mesh. What matters here is to position the head's pivot beneath the ear.
Set spine bones of the neck to your needs. This is like creating the chest spines, more bones means more work on skinning.
Creating Controllers and Customizing Bone Appearance
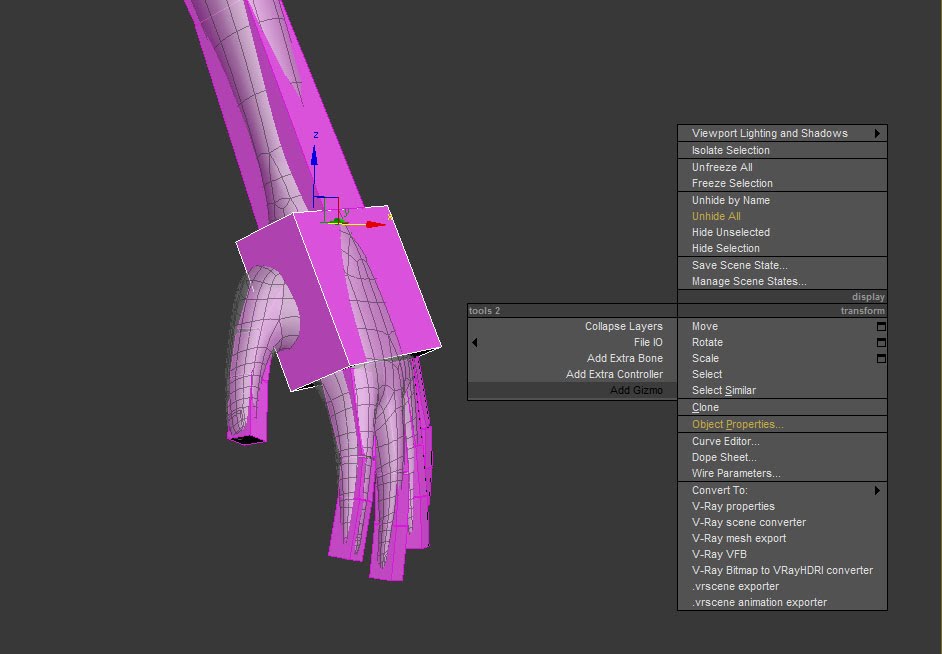
Select the palm, right click and choose Tools 2 and select Add Gizmo.
In the Gizmo window, select NGon and click OK.
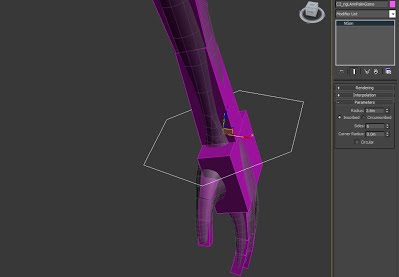
Select the NGon and adjust its radius to your liking. This Ngon is exactly the same when selecting and controlling the palm. We can do this to the other bones and hide the rig.
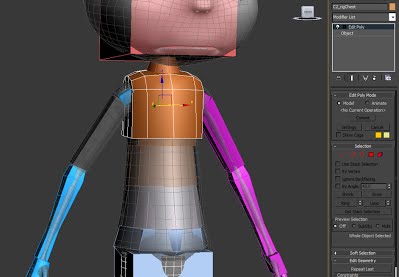
We can modify the bones to look roughly like our model. Select the Chest hub and add Editable Poly modifier. You may now edit and shape the bone.
Create Twist Bones
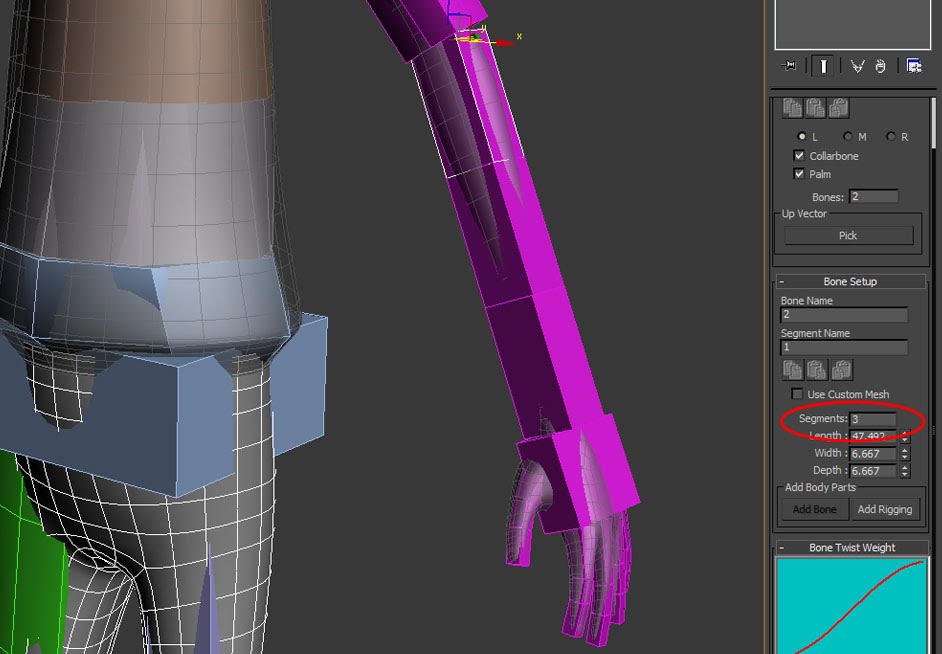
Select Arm and set its segments to 3. Resize the bones according to the mesh. This process will simulate arm twist when we move or rotate the hand.
Select Collarbone, copy the settings and paste mirror the settings to the other collarbone to transfer the edits we made with the arm.
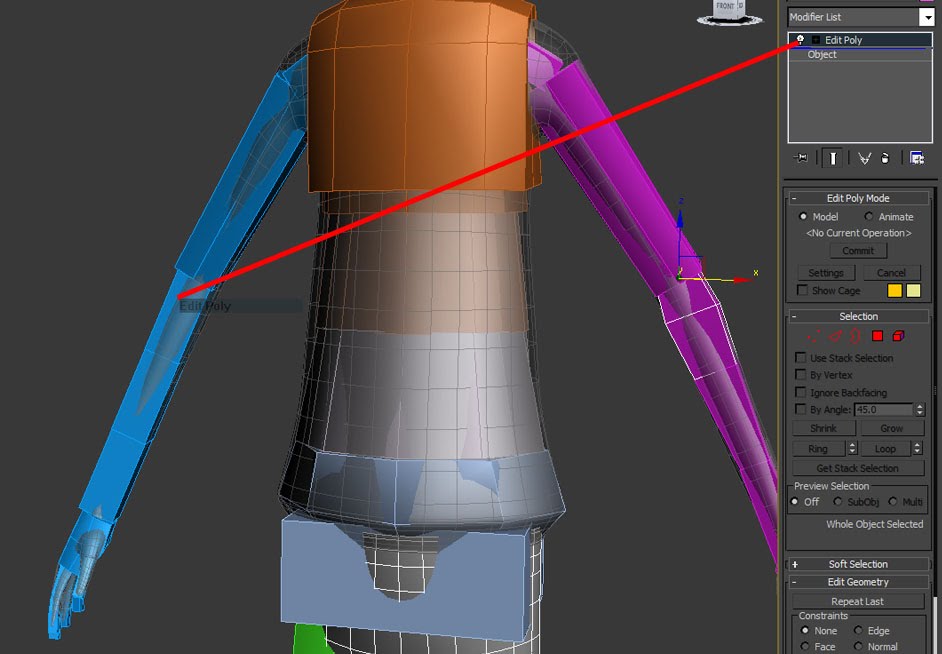
To copy the shape of the arm to the other, click and drag the Editable poly modifier to the other arm in viewport.
CHARACTER SKINNING
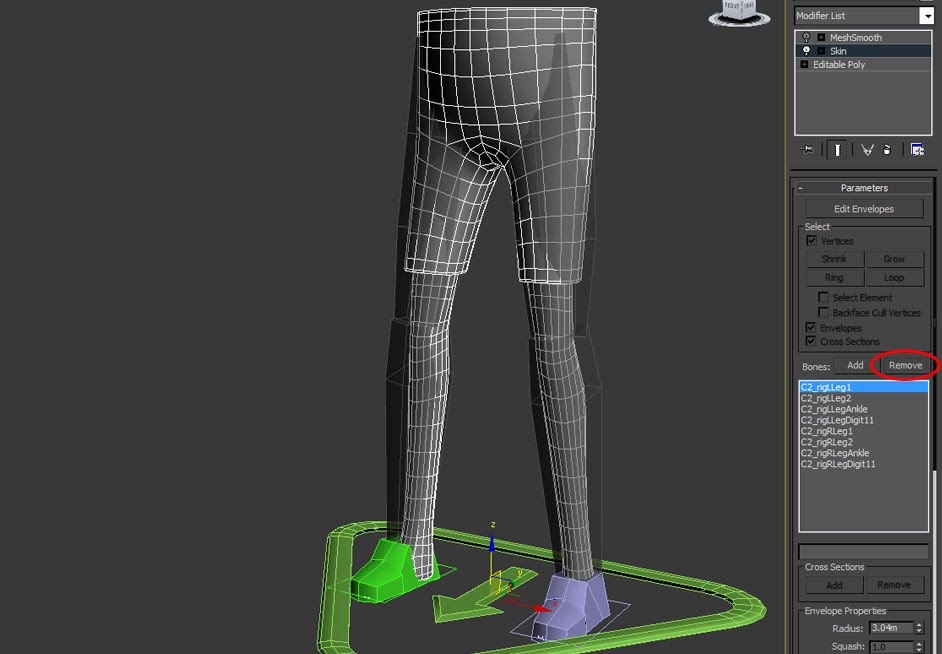
Select leg part of the mesh and add Skin modifier. Click Add Bones and select the bones that are directly affecting the mesh.
Simply click the Remove button if there were unnecessary bones added.
Lets create random poses to make the mesh move around and be able to see what is happening with our mesh.
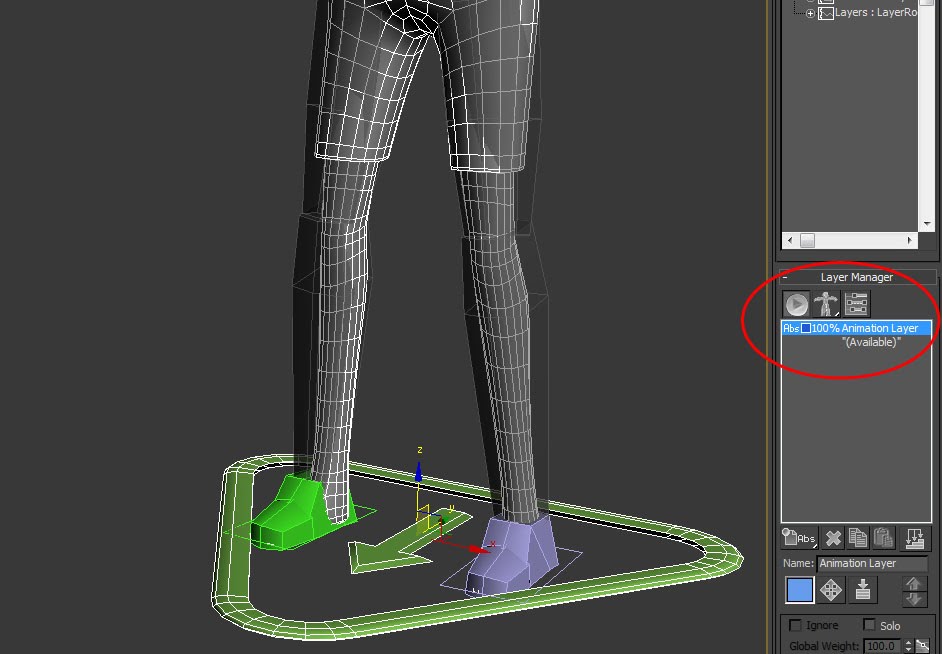
Select the rig and go to Motion Panel, Layer Manager and select Absolute Animation Layer and activate that layer.
A Rectangle icon signals that you are on edit mode while triangle means you are on animation mode.
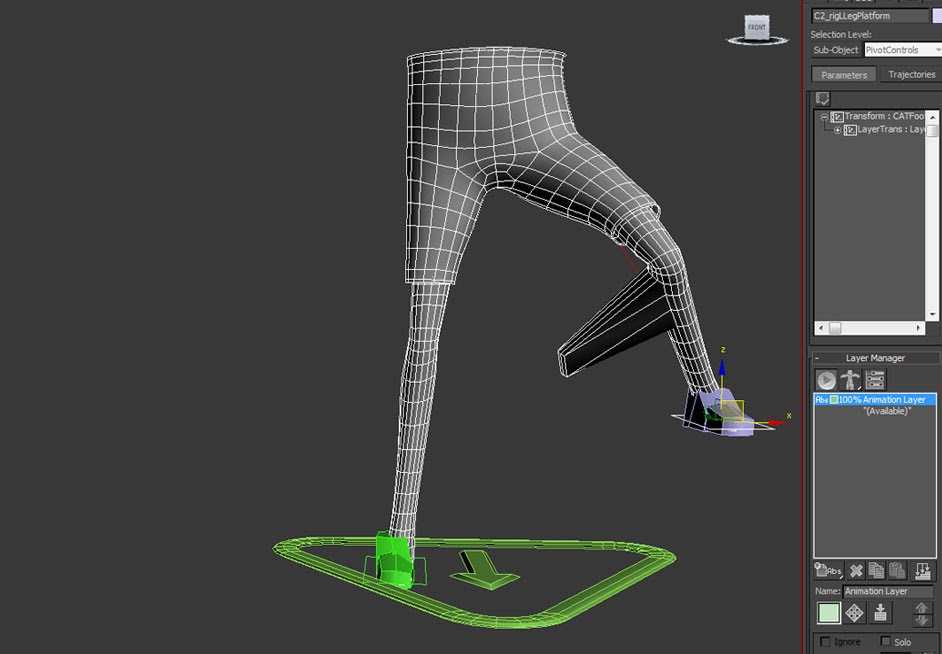
Once leg poses are made you are able to see the distortion or bad behaviors of the mesh. This serves as our primary stress test for the mesh.
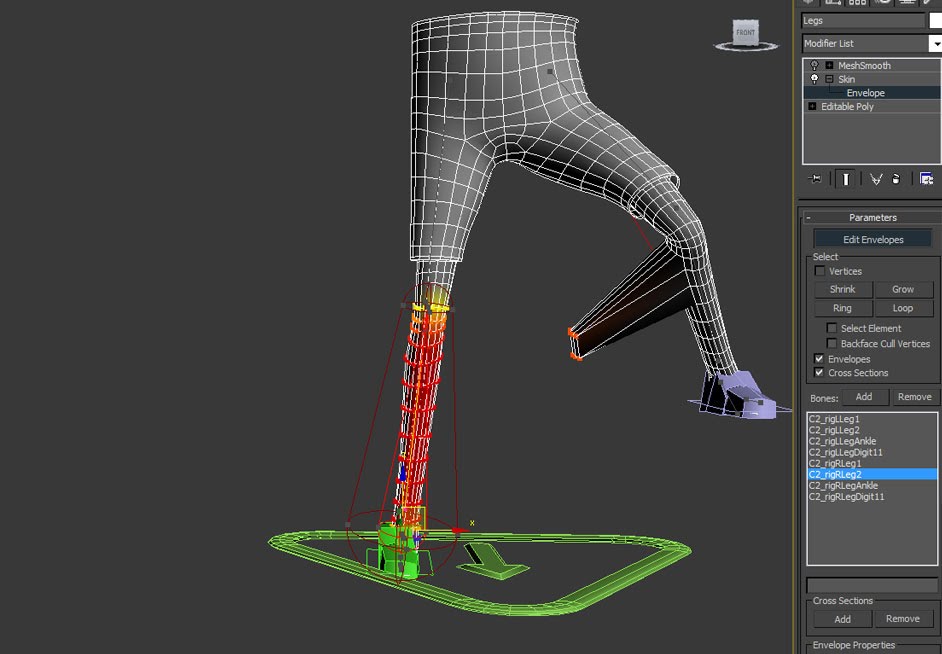
Turn the Auto key to off and isolate the leg mesh. Remember that the animation still exists, this will allow us to test the mesh and fix it simultaneously.
Go to Envelope under the Skin modifier. And inveiwport, locate the area of the mesh that needs fixing by adjusting the Envelope.
Efficient way of Skinning
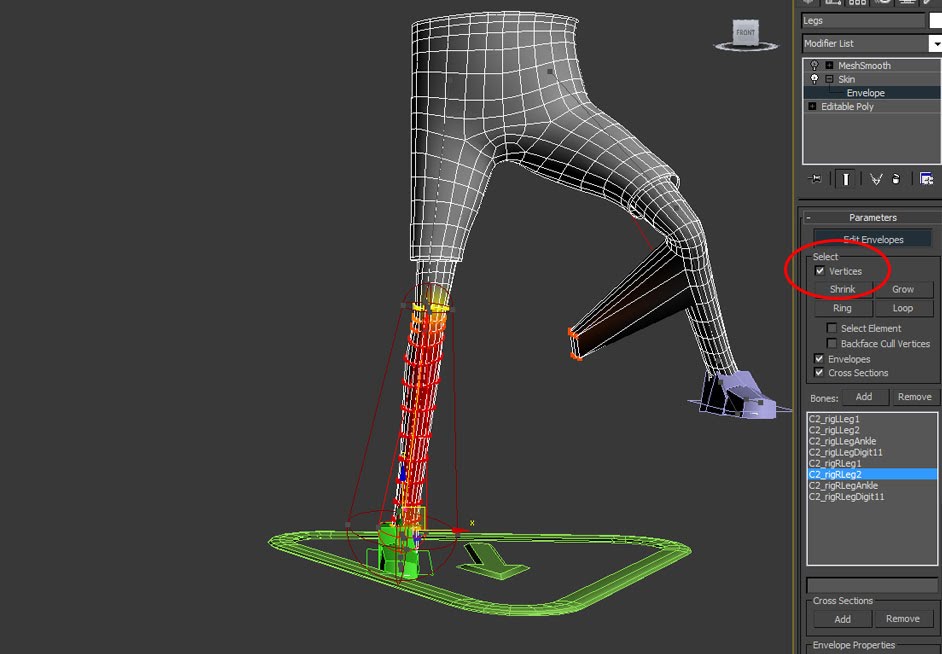
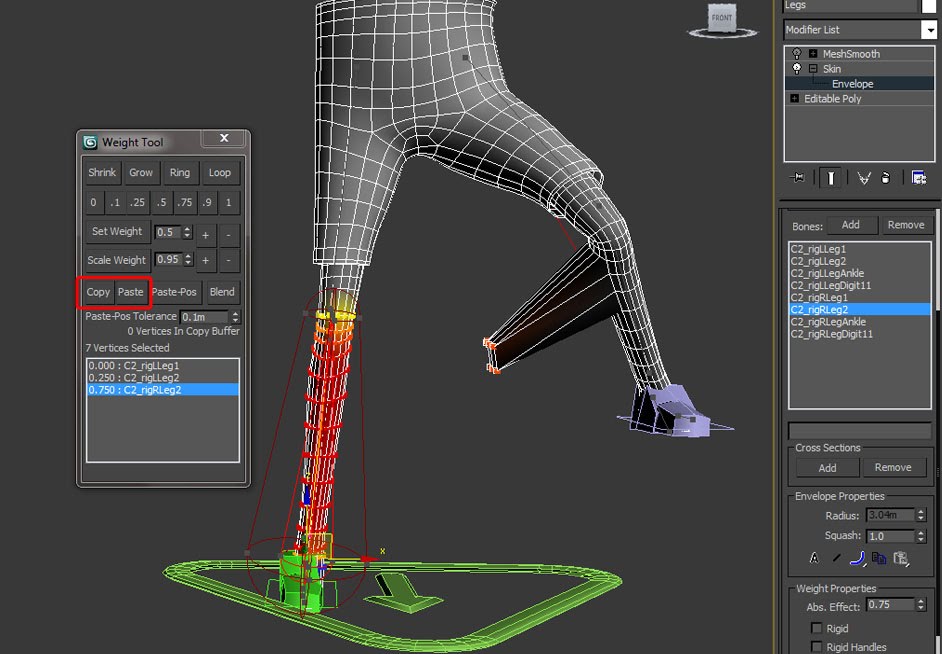
Go to the Skin modifier, Parameters and check Select vertices. This will allow you to adjust vertex influence.
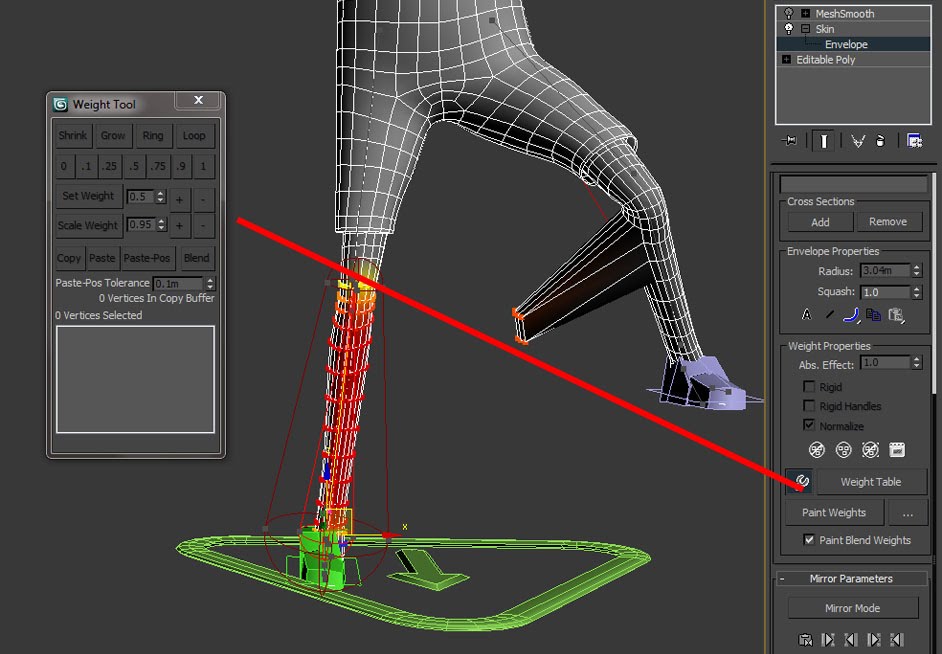
Open the Weight Tool, this tool by the way is incredibly helpful.
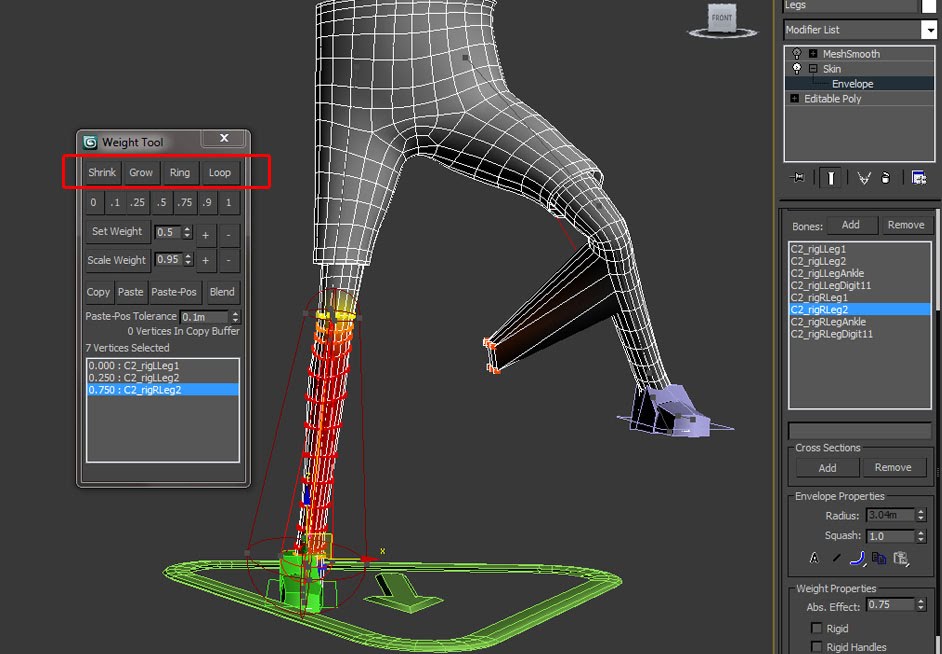
Just like modeling, we can use Shrink, Grow, Ring, and Loop vertex selection.
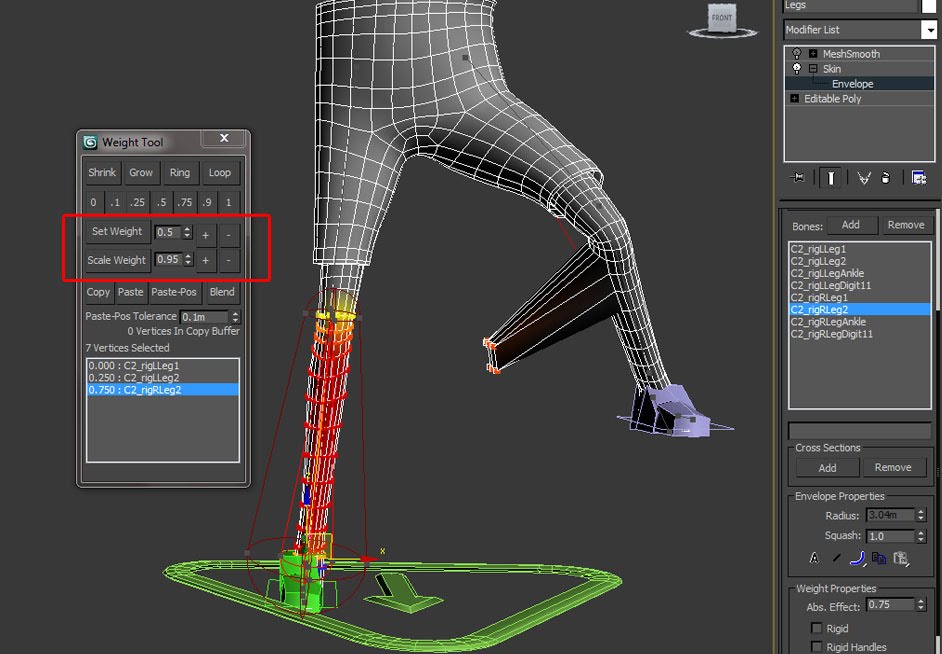
We can set the influence value of our selected vertices.
We can set manually the influence value to the selected vertices.
We can also copy influence value of selected vertex to the other.
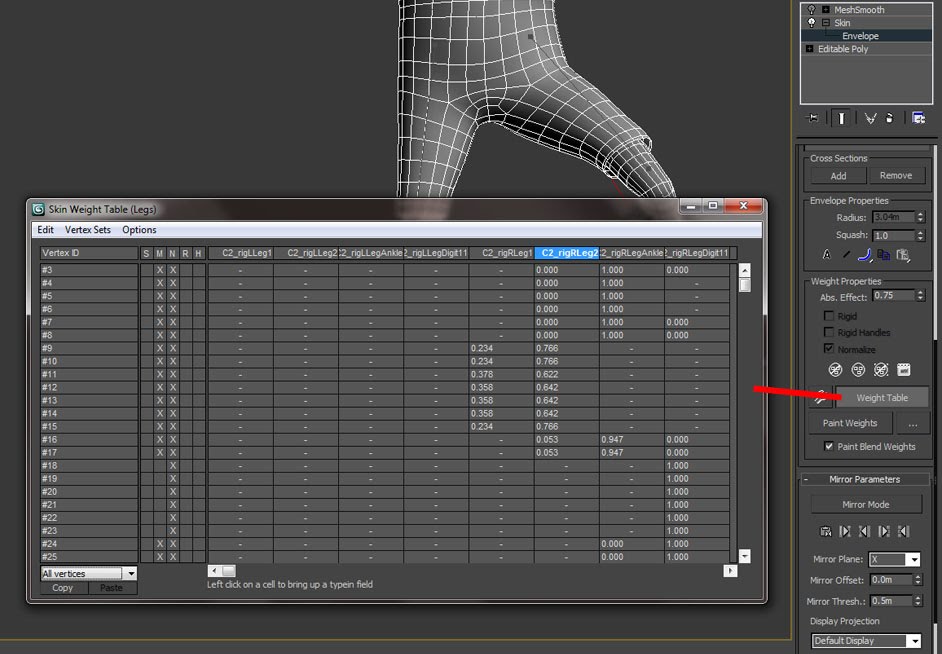
Another Tool that is helpful is Weight Table. This tool looks intimidating at first glance because all information of bones and vertices of the mesh shows up.
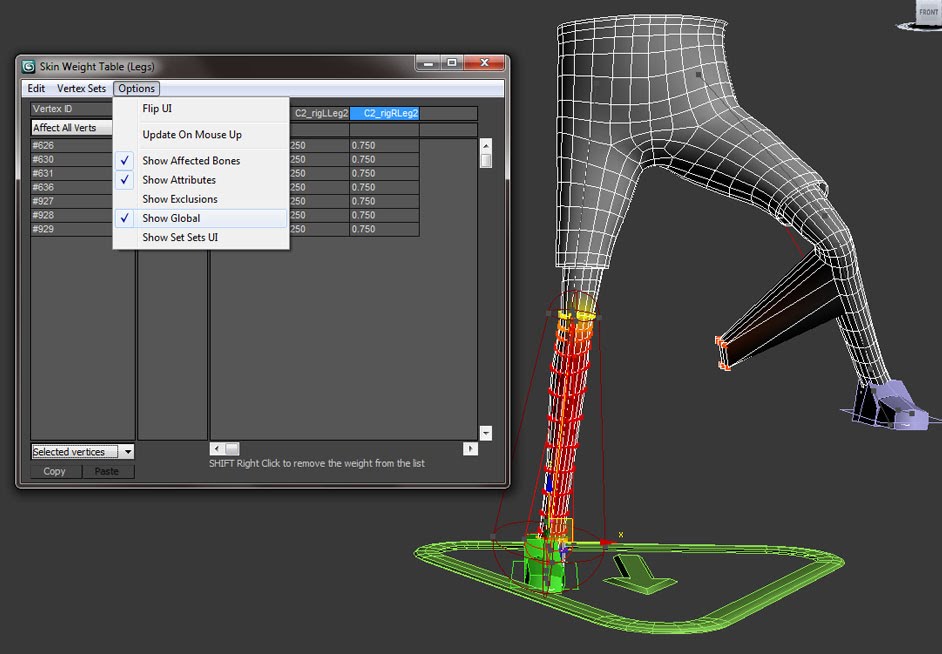
To refine this tool, set All vertices to Selected vertices and then go to option and choose Show Affected Bones and Show Global.
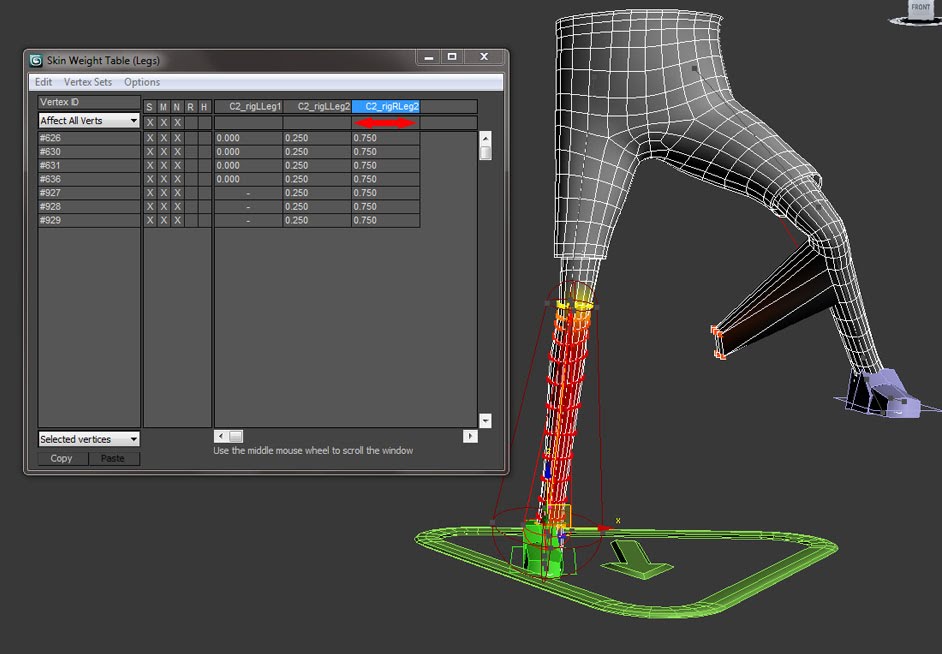
Instead of entering the influence value of selected vertices like the Weight tool, we can now drag influence value for the vertices inside the grid to fix problematic vertices.
Only do the half part of the skinning, because we can just copy mirror all the vertices influence value to the other half.
Go to Envelope under Skin modifier, Mirror Parameters and click Mirror Mode.
Choose either Paste Green to Blue verts or Paste Blue to Green verts. Green verts are on the right side while Blue is on left side. Both legs are now fixed.
And that's it. You now know the basics in CAT rigging and skinning for characters. We hope that this tutorial can be of help with your animation projects.