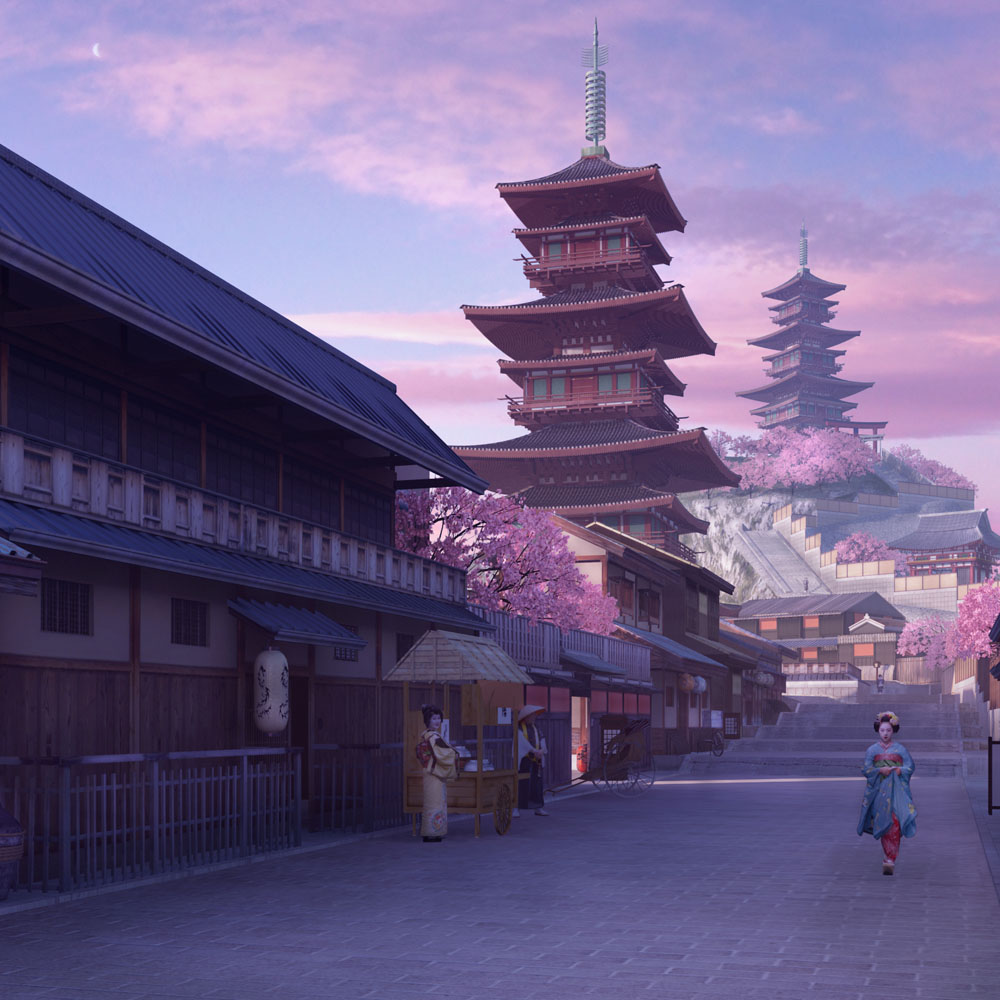
This tutorial page is intended for beginners and intermediate 3d artists who would like to advance and further their skills in 3d design. I'd like to share a technique that you can use to complete a scene like what we did with "The Sentinels" I hope this will help.
This process can be used not only in creating objects for populating a scene, but can be used to start detailed works.
This tutorial assumes that you have basic grasp about 3ds Max and Photoshop.
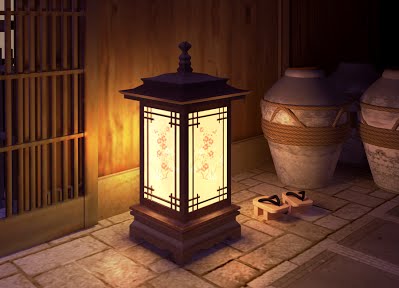
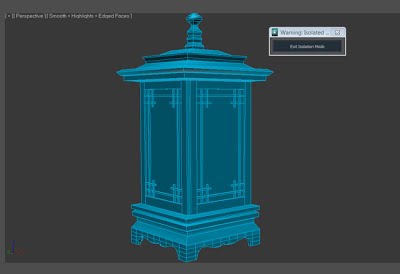
Let's start on creating a small object like this Chinese lamp:
Step 1: Prepare the image
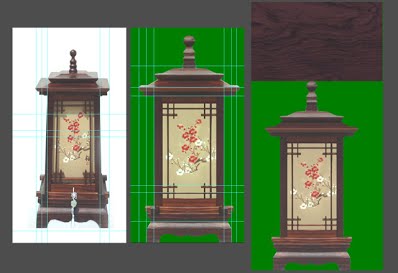
Open your raw image of the lamp in Photoshop or any photo editing tool. Use horizontal and vertical guides to help you identify the perspective look of the image. You'll need to use the 'Distort' and 'Warp' transform tools to remove the perspective view and align it properly to the guides. Erase all perspective artifacts from the image and then replace it with a contrasting background color.
Step 2: Square the image
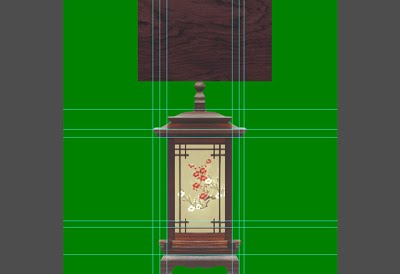
Create a perfect square image of the object. This will help you get the proportion of the lamp when you use it in 3ds Max. An additional wood texture is also needed to be used for the top part of the lamp. You can use any texture as long as it is similar the wood texture of the lamp. The image is now ready to be placed in 3ds Max
Step 3: Set up Appearance Preferences
In 3ds Max, Go to Customize-Preferences-Viewports tab-Display Drivers-select 'Configure Driver' button. In the 'Configure Direct3D' menu go to 'Appearance Preferences' and check 'Match Bitmap Size as Closely as Possible' and 'Background Texture Size' then click OK. Reset your 3ds Max for changes to take effect. These changes will make your maps clearer in the viewports.
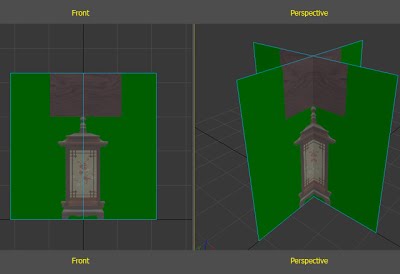
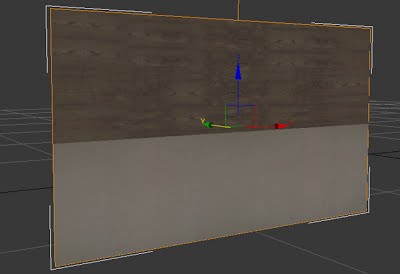
Step 4: Virtual studio in 3ds Max
Let's create a material with our lamp image as the Diffuse map. First, create a plane in the Front viewport with square dimensions. Apply a Modifier: 'Planar UVW mapping', be sure 'Real-World Mapping' is unchecked. Apply the material to the plane and turn on 'Show Map' in the viewport. Press F3 to toggle the viewport to a shaded view. At this moment, you do not have to be concerned about image proportioning.
Clone the plane by holding down Shift while rotating it by 90 degrees. The resulting object is what we call a Virtual Studio.
This will serve as our reference when we start modeling our 3d lamp.
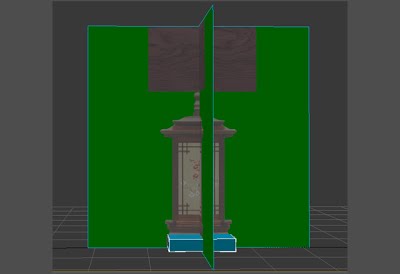
Step 5: Create the prim
Create a Box and position it at the center-bottom of our Virtual Studio. Convert the Box to an 'Editable Poly'.
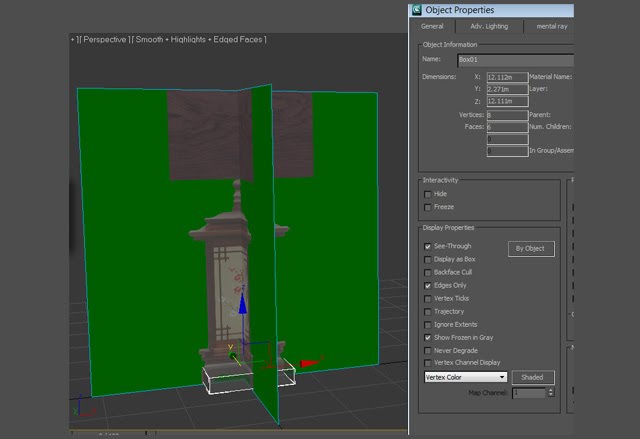
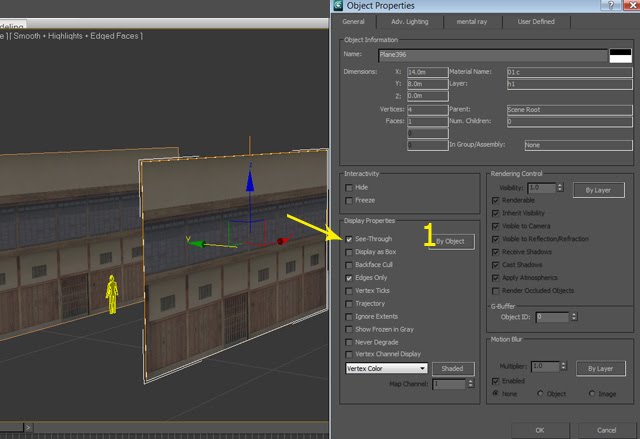
Step 6: Make the prim see-through
Right-click on the Box and go to 'Object Properties>', under 'General Tab' look for 'Display Properties'. Check 'See-Through' and click OK. You can now use 'Alt+X' to toggle see-through in viewport.
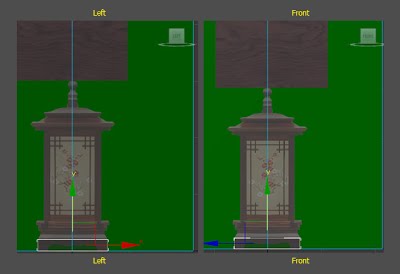
Step 7: Alignment
Align the Box with the image in the Front and Left viewport of our Virtual Studio. You can move your sub-objects like 'edge' and 'vertex' for your alignments.
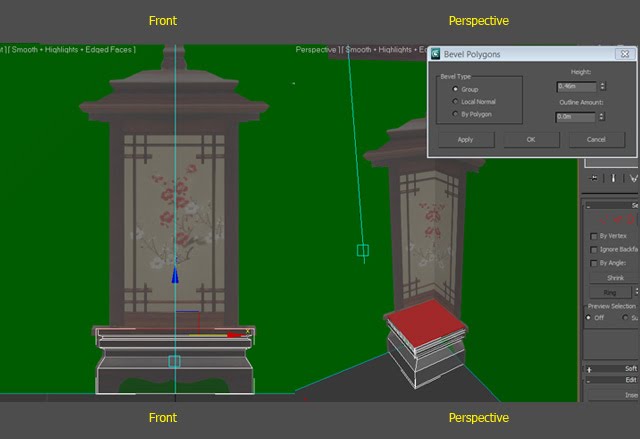
Step 8: Bevel
We will use 'Bevel' to roughly model our lamp. Use your Front view of our reference image to gradually mold the lamp using the Bevel tool
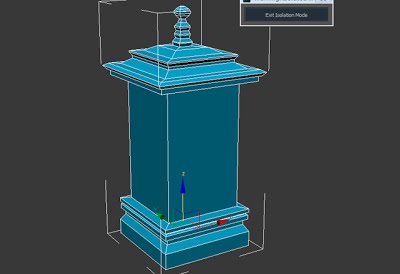
Rough Model
Here is our rough model of the lamp:
Step 9: Use Cut tool for details
It is a good exercise to subdivide the polygon first then do the Cutting to avoid creases. Use the Cut tool in Front view as if tracing the image reference.
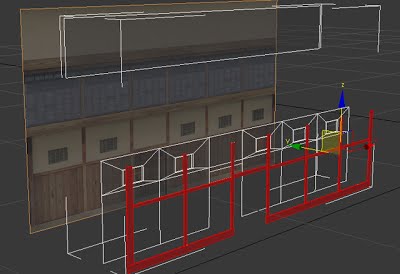
Step 10: Clone, Flip, and Weld
Instead of trimming each side for the lamp legs, just delete it, use Clone(to Element) and replace it with the first leg we did. Be reminded about polygons (we have front and back face of polygon, back face tends to be transparent when 2-Sided option is Off), use the 'Flip' tool to correct it. 'Weld' your vertexes. Shape it with the help of our Virtual Studio.
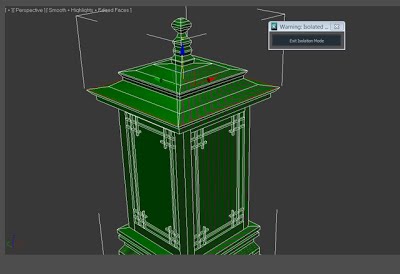
Step 11: Adding more details
Use the same methods in Step 10 in creating the lamp frames, start with 'Cloning(to Element)'. Finish shaping the frame and make a copy of it for the remaining sides. Furnish it with your reference.
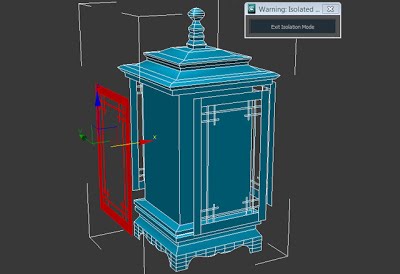
Finished Model
Here is our finished lamp model. Using good reference images and little ingenuity will enable you to model quickly and intelligently.
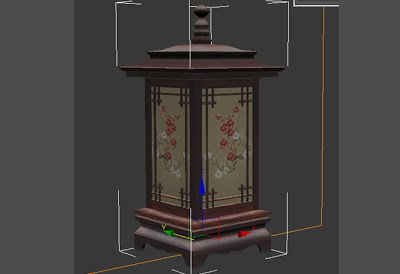
Step 12: Using UVW Map Modifier and Adding Material
Copy the Planar UVW Map from the front plane of our Virtual Studio and paste it to our lamp model. Align the copied modifier with the original. You can use Uvw Acquire Alignment for convenience. Also apply the material we made to the model.
Step 13:Moving Vertex and Edges
If necessary, access the 'vertexes' and 'edges' to fix image distortion and streaks due to Planar Uvw Mapping. Tweak symmetrically in this situation.
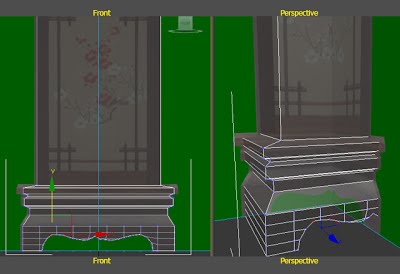
Front View
Front view is okay, next step is to fix the side of the object.
Step 9: Use Cut tool for details
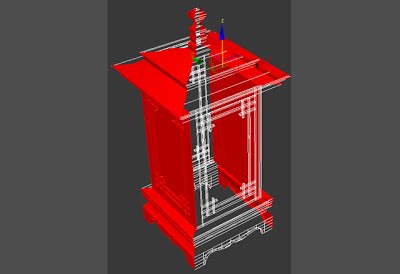
Select polygons and 'Detach' as new object we'll use for the lamp's sides.
Detach as an Object
It is a good exercise to subdivide the polygon first then do the Cutting to avoid creases. Use the Cut tool in Front view as if tracing the image reference.
Side View
Copy the Planar 'Uvw Map' of the side plane in Virtual Studio and paste it to the lamp model. Align the copied modifier with the original. Use Uvw Acquire Alignment for convenience. Collapse the stack modifiers of the lamp objects and attach them. Our lamp is now ready to use.
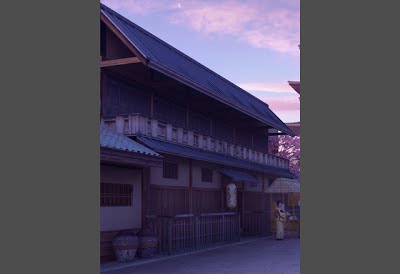
We are ready now to create this house.
This is the raw image:
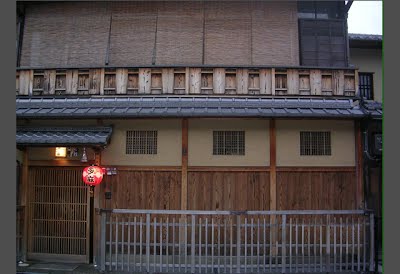
Step 1: Prepare image
Prepare, fix and clean the image in Photoshop. Compose extensions by copying walls to left side of the house. Prepare 2 versions of image reference. The left image is for details like curtain, fence, roof and veranda and the right image is for the wall. Before loading it to 3ds Max, set up the Appearance Reference and Reset the application (as before).
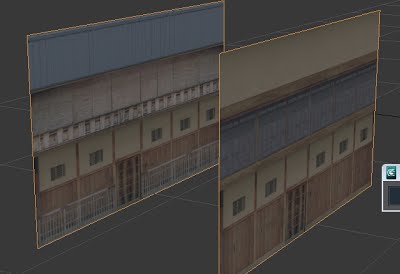
Step 2: Scale Reference
Copy the wall plane and collapse it along UVW map modifier. Scale it by moving edges. Use human height as scaling reference. Apply new Planar Uvw map to scaled plane, turn off the Real-World Map Size and 'Align to Fit'. Copy the new applied UVW map modifier.
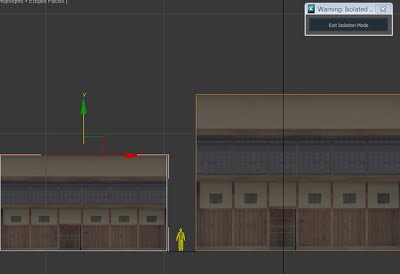
Step 3: See-through
Copy the scaled wall and make it 'See-through'
Step 4: Use Cut tool for details
Start Cloning (to Elements) and shape it with the help of plane wall behind.
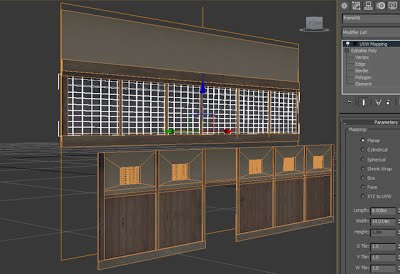
Step 5: UVW Map
Instead of shaping every details of the wall in one object, divide it. Just apply the UVW Map for every new object created.
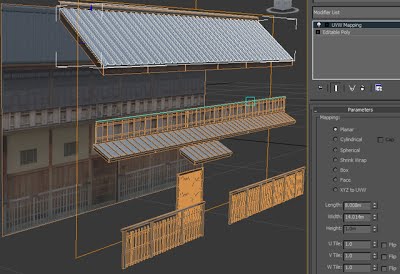
The same way in creating these details. Apply the same UVW map for roof, veranda, fence, and door object. For the roof, rotate the object after shaping.
Copy objects and use Cut or Quickslice tool for trimming the corners.
Step 6: Filling details
If necessary, create a texture to help filling in some details such as roof braces and veranda floor.
Here is the house:
I hope this gives you an idea of how to populate the scene and make it believable.
For lighting, Day Light System was used in The Sentinel scene. The only tweak made was the value of Aerial Perspective, it was changed from 100000m to 70m. This gave a hazy look for the distant objects. Rendering output was then enhanced in Photoshop. Thanks!